Several of you have emailed me to ask about how my sewing room is set up. I guess I never thought about showing it off because it's not very cute or attractive. It's a rather plain area with a hodge-podge of organizing tools. I've just used what I found here and there. Many of the things I have are hand-me-downs from my grandmothers or my hubs grandmothers. Actually, I don't think I'd have it any other way. I come from a long line of creative women and having their "treasures" makes me feel like I'm carrying on their legacy. I have very big shoes to fill.

I found this small drawer unit at the thrift store and I spray painted it black. I made small tags to label thread colors.
 odds and ends of thread, sorted by color

I found this small drawer unit at the thrift store and I spray painted it black. I made small tags to label thread colors.
 odds and ends of thread, sorted by color
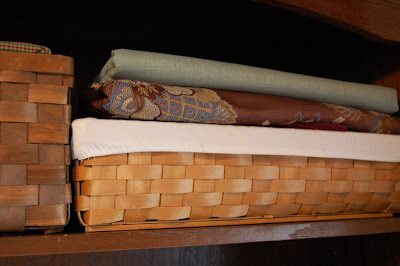
I've purchased baskets whenever they were on clearance to hold fabric. These two baskets hold upholstery fabric for current projects and Christmas fabric that I'll be using to make items for my etsy shop.

 simple labels, hand written


Years ago I purchased a hardware sorter (in the middle) from Big Lots. I sorted my buttons into it and got a lot of ribbing from my family for being just a little too organized. I love that I can find any button I want in just a few seconds. I even have one small drawer for those little spare buttons that come with garments I purchase.
Imagine my surprise, after receiving hub's grandma's bin of sewing supplies, that she had organized her buttons almost exactly as I had. Her buttons have my buttons beat by a mile when it comes to beauty and variety. Some of her buttons are antique and many of them came from Germany. I love to use them on Christmas ornaments and now on items I sell in my etsy shop.
 simple labels, hand written
I love my Longaberger button basket even though I don't use it for buttons. I have my grandma's tomato pin cushion in a hand painted sugar dish. Hubs accidentally broke the lid and so I just use the base now in my sewing room. The basket also holds my tape measure which is held together with a clothespin, a magnifying glass, small scissors, and a seam ripper (which I use a lot).


This is my sewing machine. It was my grandmothers. It is a Kenmore that was made in the 1970's. It is mostly made of metal and it works really well.


This is the view from the window of my sewing room. Even in the winter, the trees are beautiful. My sewing room/office gets morning light and on nice days I can open the windows and get a cross breeze.
 At the end of the day, I like to cover my machine up with a cover I made. Nothing fancy - just practical and cheerful.
 At the end of the day, I like to cover my machine up with a cover I made. Nothing fancy - just practical and cheerful.
Comments
Post a Comment
I'd love to know what you're thinking. Please feel free to leave ideas and comments.